It's the time of year for snatched moments at the sewing machine, desperately sewing together last minute Christmas presents.... and today I finished one of those presents. At the start of December, with loads of time left before Christmas, I started making some pairs cards for Mia: I fussy cut from my fairly small stash of novelty fabrics: two of each print to make a total of 24 "cards". And very quickly I added the white borders.

And then I procrastinated. Eventually I picked a backing fabric, and procrastinated a little more. Because I knew that once I had completed the next step I would have 24 cards to turn through and make neat. Not my favourite task. Especially when I am extremely good at leaving a turning gap that isn't quite big enough for the job to be easy.
It was our patchwork club's final get together before Christmas last Monday and I decided that this awful task would be made slightly less painful with some company. It took me over an hour and a half to turn them all through. Possibly as long as the rest of the construction put together! But it is done.

The cards needed some thing to keep them together, so this morning I made the zippy pouch. The grand theory is that 24 cards is a great number to start off with, but with plenty of the backing fabric, if I get some more good novelty prints, I can gradually add to that number, which will keep the game interesting as Mia grows. If she likes it at all, that is.
I had a fair few questions on Instagram when I posted this earlier about the details, so here they are:

And then I procrastinated. Eventually I picked a backing fabric, and procrastinated a little more. Because I knew that once I had completed the next step I would have 24 cards to turn through and make neat. Not my favourite task. Especially when I am extremely good at leaving a turning gap that isn't quite big enough for the job to be easy.
It was our patchwork club's final get together before Christmas last Monday and I decided that this awful task would be made slightly less painful with some company. It took me over an hour and a half to turn them all through. Possibly as long as the rest of the construction put together! But it is done.
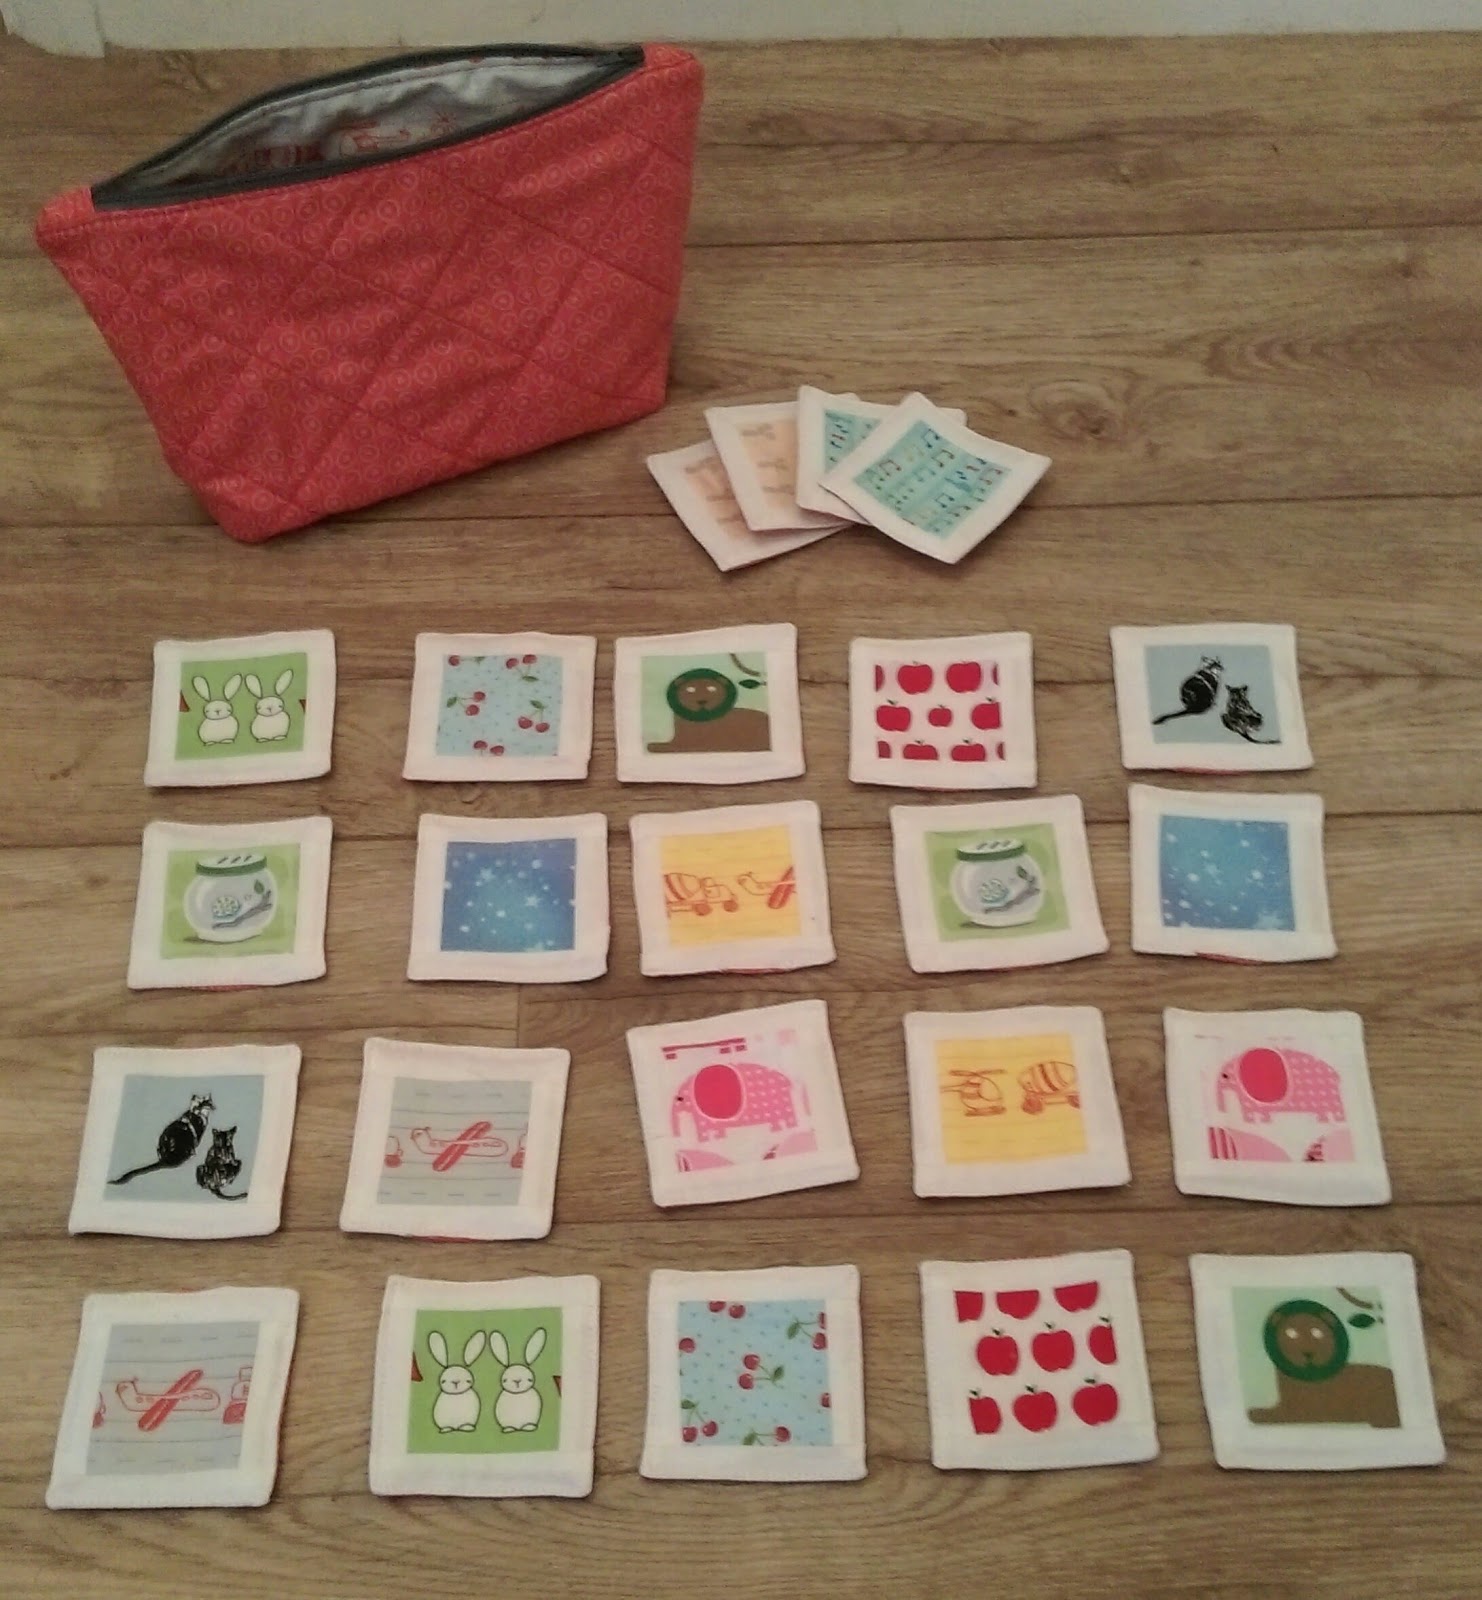
The cards needed some thing to keep them together, so this morning I made the zippy pouch. The grand theory is that 24 cards is a great number to start off with, but with plenty of the backing fabric, if I get some more good novelty prints, I can gradually add to that number, which will keep the game interesting as Mia grows. If she likes it at all, that is.
I had a fair few questions on Instagram when I posted this earlier about the details, so here they are:
- I cut the novelty fabrics at 2.5" x 2.5"
- I cut white strips at 1" wide, so per card: 2@ 1" x 2.5" and 2 @ 1" x 3.5"
- I didn't use interfacing. Before I placed them RST and sewed my seams, I added a scrap of wadding cut 1/2" smaller than the card: I glued this to the backing fabric to keep it in place.
- Reverse stitch at the start and end of your seams and leave enough space to turn through comfortably! Ask me how I know!
- Trim the corners before turning through, line up the opening and press before top-stitching about 1/8th inch from the edge to close the gap.
The zippy I made is the same as all the zippies I make: the pieces are cut 11.5" x 8.5" and then I use the zipper tab tutorial here and box the corners at 1.5".
I'm pretty certain I didn't come up with this idea on my own - there's likely some pins on my Kiddy Sewing board on Pinterest that come pretty close, but I wasn't specifically referring to any when I made this gift.
Comments