Nested Churn Dash [a finish]


When I first saw the nested churn dash blocks pop up in Blogland I wasn't sure about them. It took me a while to realise that the reason I didn't like it is because the outside rings were too skinny - I'm more of a chunky girl myself! What I mean is that a traditional churn dash block is based on an even nine-patch where the length of the bars is the same as the shorter sides of the triangles in the corners. These churn dashes have long skinny bars and chunky corners.


So I ignored these blocks for a while. And then I saw this. And I was totally inspired to make my own. No single block for me - oh no! Two 24" blocks, two 16" blocks, seven 8" blocks and fourteen 4" blocks. This was a great way of using the ten minute slots I get during the day - the ten minutes between feeds, nappies and naps when my daughter is happy - cutting all the pieces, then gradually piecing all the blocks.


I pulled a huge range of fabrics from my stash for this project, starting with a half-yard bundle of hoarded Happy Mochi Yum Yum in oranges, yellows and pinks.
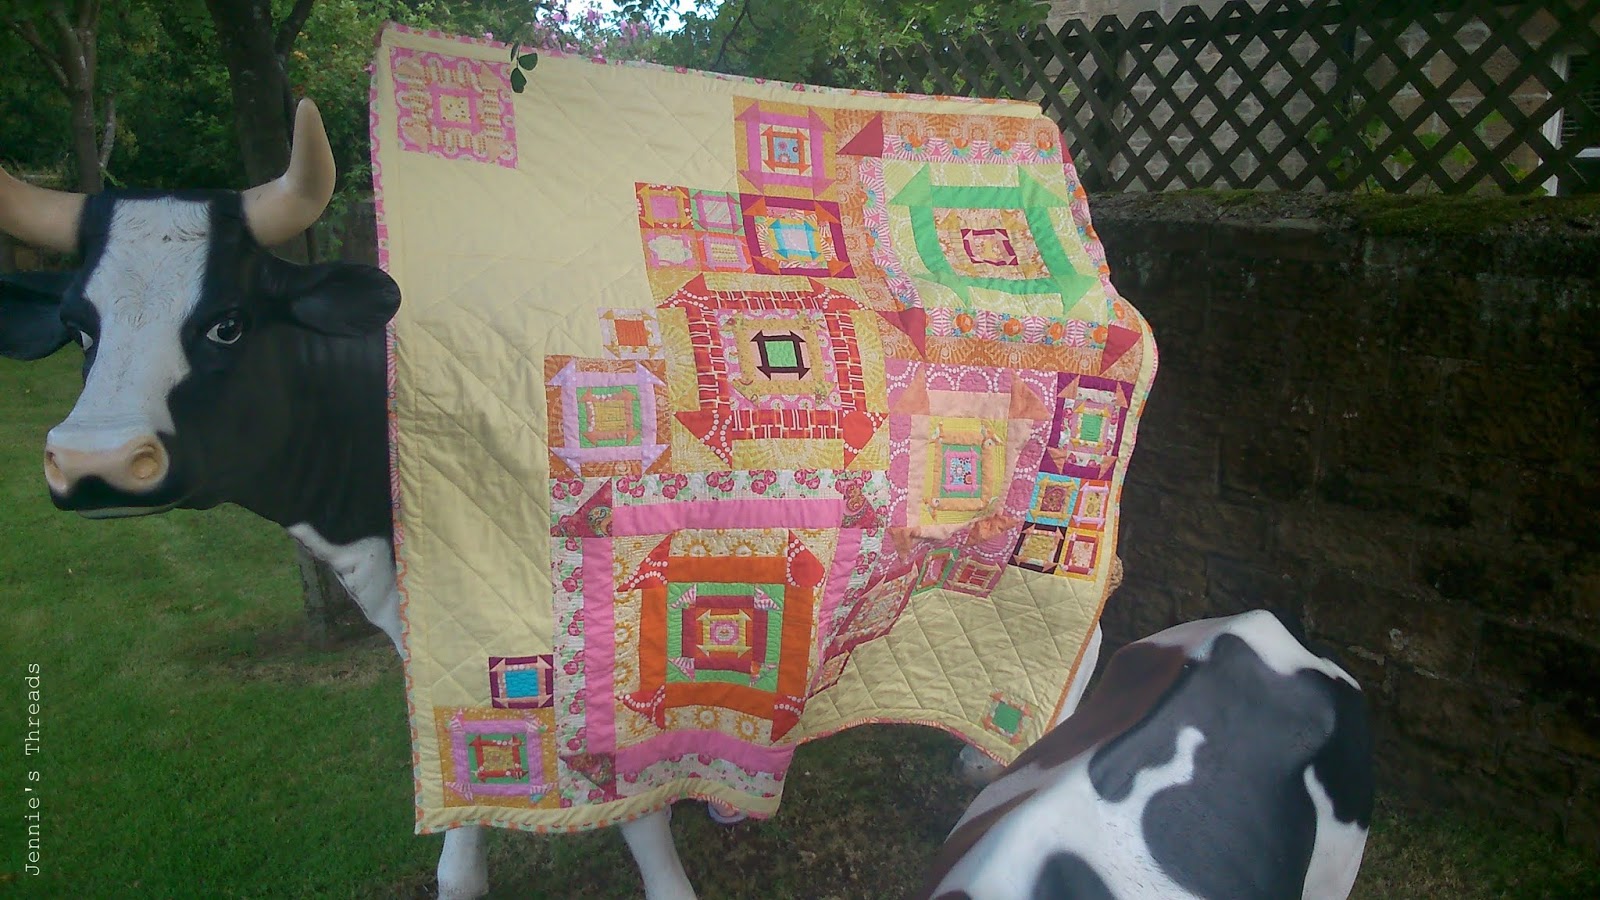
Some [plastic] cows helped with the photo shoot!
 I also added a splash of green and an even smaller splash of bright blue. There were at least 56 different fabrics - each of the fourteen 4" blocks has four fabrics and I didn't repeat any: Kona solids, Comma, Noteworthy, Pearl Bracelets, Architextures, Tula Pink, a smattering of Art Gallery, Benartex and Riley Blake... The larger areas of negative space are Kona Maize, which is a lovely pale, but golden yellow.

The backing is possibly a polycotton, but good quality and with a pretty little flower pattern, and from a discount fabric warehouse nearby - at £6/meter I'm not complaining. Unfortunately I bought it a touch too small, so there are two pieces of leftover Happy Mochi Yum Yum pieced in.

I thought a long time over how to quilt it. Initially it was going to be an all over pattern, but because of the thousand different fabrics used, in some of the blocks the churn dash is a tad hard to spot, so to help the eye I decided to do different fmq pattern in all of the "background" areas.
Bugger - I missed a bit....can you spot it?

 I had a ball quilting this one.

 I really feel as though my free motion quilting has improved hugely over the last few months, and with it my confidence to try something different. Like my Neon Stained quilt, there are a few bits that I'm not in love with, but more bits that I am in love with. And the texture is gorgeous. I'm definitely a "quilt-it-densely" kind of girl! To contrast with the dense blocks, the negative area is a 3" cross hatch. I'm going to need to spend some time building my stash of threads, as I struggled to match some of the fabrics!


Given the million different fabrics in the quilt I decided a scrappy binding was appropriate.

The finished quilt measures 60" x 60" (before washing).
The pattern is from Quilt Jane.

And this is a Finish Along Finish!
Finish Along 2014


Comments

Marly said…
Congratulations on giving the pattern your own twist. It's terrific how you've arranged your blocks into a really dashing quilt..
pennydog said…
That's a fabulous layout!
Absolutely striking! CONGRATS!
Lin said…
Love your quilt Jennie- the original layout works really well. xx

Popular posts from this blog

365 Quilt Challenge 2016 [A finish]

I can't believe I've just typed that heading! When I made the block for January 1st 2016 I could not have imagined the journey this quilt would have taken me on. So make yourselves comfortable and grab a cup of tea, because this blog post may get lengthy! I'd seen the 365 Quilt Challenge on Facebook. I think every quilter on Facebook must have been aware of it. Loads of my friends had signed up and it kept popping up as a "Page you might like" thing. In the end, in November 2015, I joined the group, had a poke round. Decided it wasn't for me. One of the things that really put me off were the fabric requirements: you needed x amount of dark dark fabric, x amount of medium dark fabric, x amount of dark medium, medium, light medium, light, background.... I just couldn't get my head round those requirements. I'd looked at the mock ups on the wesbite and couldn't bring myself to pick a colour. I put it to the back of my mind. But I had obvious...

Hidden Agenda [A Finish]

This is very possibly my favourite ever finish - I know I've said that in the past, but this one is going to be hard to beat. This time last year, I attended a day long lecture/workshop with Tula Pink and it was inspiring. Having not really loved her fabrics in the past (but loved her patterns), I suddenly saw them in a new light, linked with my 2018 new year's resolution to try more fussy cutting). Fast forward 8 months and I confess that my Tula stash has expanded quite a lot. I found some UK shops with older ranges of fabric, splurged on a few destashes and found the odd piece of her fabric already in my stash. The plan was always (and remains) to make a Smitten quilt, but I'm well aware that I have plenty of fabric to make other projects as well! So when I saw the Hidden Agenda quilt pattern by Angela Pingle, this fabric sprung instantly to mind.... and we all know I love a rainbow! And what could be better than rainbowfied Tula? I was ably assisted by my friend Ti...

February Embroidery Along [A Finish]

I've really been enjoying my embroidery this year, after not doing very much last year. One of the challenges I set myself at the start of the year was to learn to colour tint my fabric before adding the embroidery - I love buying the pre-printed panels, but I'd like to do this myself as well. And the opportunity to learn this arose in February. Meg Hawkey of Crab Apple Hill Studio hosted a stitchalong to celebrate National Embroidery Month, and the first step was colour your fabric. I bought the pencils she advises,  the blending stumps, something called fabric extender and the pigma pen. And I gave it a go. My first attempt ended badly. Because the one thing I didn't buy was a new, clean paintbrush. So when I came to add the fabric extended, it went all bleary and muddy as, despite cleaning the paintbrush thoroughly, it obviously wasn't clean enough. It was unsalvageable so I started again, and I was so much happier with the results. The practice piece was, in...

Labels

Show more

Archive

Show more